

In this article...
I’ve decided to write this guide after one too many conversations in the shop that went something like “what’s the difference between airflow and wattage, and why do I need to touch either of them?” It’s a fair question.
Nobody explains this stuff clearly when you’re stood at a counter trying to pick your first proper kit, and most of us end up figuring it out through trial and error, usually a burnt coil or two along the way. So here’s the plain version, the one I wish someone had given me when I started.
What is airflow in a vape?
Airflow is simply how much air gets pulled through the device alongside the vapour when you inhale. Open it right up and you get a loose, airy draw, similar to breathing through a thick straw. Close it down, and the draw gets tighter and more restricted, closer to the pull you’d get from a cigarette. Neither is right or wrong, it’s entirely down to what feels natural to you.
If you’ve come from smoking, you’ll probably find a tighter airflow feels more familiar at first. Vapers who’ve been at it a while, or who enjoy bigger clouds, tend to prefer it wide open. There’s no rule here, just preference, and most decent kits these days let you adjust it rather than locking you into one setting.
A quick airflow tip:
Running your vape with higher airflow will generally burn through liquid faster. If this is an issue, you can use lower wattages or higher resistance coils to offset the greater e-liquid consumption.
MTL vs DTL and how it affects airflow
Most pod kits on the market are built for MTL, (mouth-to-lung) which can feel a bit odd if you’re not used to it. Open the airflow slider all the way on one of these and you’ll mostly just get a mouthful of air rather than anything useful. If DTL, (direct-to-lung) is more your style, you’ll usually need a kit and e-liquid designed specifically for it. That’s where a fully open airflow slider actually earns its keep, giving you a smooth, airy draw without the harshness of a tight, restrictive pull.
When you’re just starting out, I’d set the airflow slider to the middle and get a feel for things from there. If you find yourself wanting bigger clouds and a looser draw, that’s a good sign DTL might suit you, and you can pick up a kit built for that further down the line. For now, though, I’d start with MTL and get comfortable before you go looking for anything more.
What is wattage in a vape?
Wattage is the measurement of power being sent to the vape coil by the battery. Turn it up and the coil heats faster and produces more vapour, along with a more intense flavour and a slightly warmer draw. Turn it down and you get a cooler, gentler vape with less vapour.
The important bit most people miss: wattage has to match the coil you’ve got fitted. Every coil has a resistance rating, and every resistance rating has a recommended wattage range. Push too far outside that range and you risk a burnt, unpleasant taste, or in worse cases, damage to the coil itself.
This is why the better kits on the market now do a lot of that thinking for you. Insert a pod, and the device reads the resistance and suggests a sensible wattage automatically. You can usually still override it if you want more control, but you’re not left guessing.
A quick wattage tip:
Running your vape on a higher wattage will deplete your battery faster, as it’s more of the battery’s power being used to fire the coil. If you feel you’re going to want to run your vape at a higher wattage, it might be worth opting for a kit with a higher battery capacity.
Lumina: Starting simple
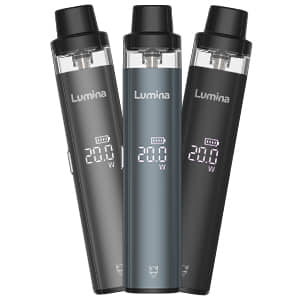
If you’re brand new to all this, the Lumina is where I’d point you first. It’s built specifically as a step up from the most basic auto-draw pod kits, without throwing you in the deep end. The airflow slider sits on the back, simple to find and adjust, and the device automatically detects your pod’s resistance and sets a sensible wattage the moment you insert it.
You can still nudge the wattage yourself through the side button if you want to experiment, but you don’t have to touch a thing if you’d rather it just worked. I like that it supports both button and draw activation too, so you’re not forced into one habit before you’ve worked out which you prefer.
The best thing about the Lumina is that you can use both pre-filled and refillable pods. So if you don’t want the hassle of carrying around liquid, the Lumina is definitely worth consideration.
Aeromax Boost: A little more control
Once you’ve got a feel for how airflow and wattage change your vape, the Aeromax Boost is a natural next step. It runs a wider 8 to 40 watt range, an airflow slider on the side rather than the back, and a dual mesh coil setup, meaning two coils working together in the pod rather than one – which in my experience keeps flavour tasting fresher for longer as the pod empties.
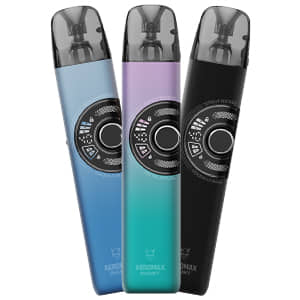
It’s still smart enough to recommend a wattage automatically, and it’ll remember your preferred setting after a couple of consistent puffs, but there’s more room here to actually play with the numbers if that’s what you’re after.
Mavro Pro: Full control
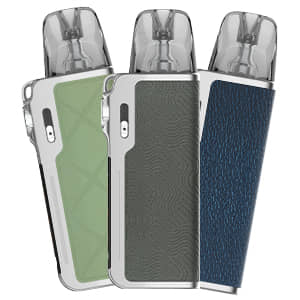
The Mavro Pro is where things get more serious, and I wouldn’t personally recommend starting here if you’re brand new. It runs up to 50 watts, has a proper adjustable airflow slider on the side, and includes a Dual Mode setting that effectively halves the coil resistance for a much airier, sub-ohm style draw, the kind of setup vapers move towards once they’ve decided they want bigger clouds and a looser inhale rather than a tight, cigarette-like pull.
It’ll still auto-detect your pod and stop you from setting the wattage dangerously high, which I think is a sensible safeguard regardless of experience level, but there’s a lot more here to tune if you want it.
What to look out for when playing with wattage
I’ll say this plainly: don’t assume higher wattage automatically means a better vape. It doesn’t. It means a different vape, and often a harsher one if you push it too far past what your coil’s rated for. I’ve made that mistake myself, more than once, usually out of impatience rather than any good reason.
It’s also worth giving a new pod a few minutes to settle before you vape on it properly, most kits recommend around five minutes, so the wick has time to soak through. Skip that step and you’re far more likely to get a burnt taste on your first few pulls, which has nothing to do with the device and everything to do with rushing in.
And finally, whichever kit you land on, start lower than you think you need to. You can always turn the wattage up. You can’t undo a scorched coil.
If you’re just starting out, the Lumina genuinely is the easiest place to build confidence with these settings before moving anywhere more advanced. Take your time with it. There’s no prize for jumping straight to the top of the range.